Troubleshooting the Prusa MMU2S
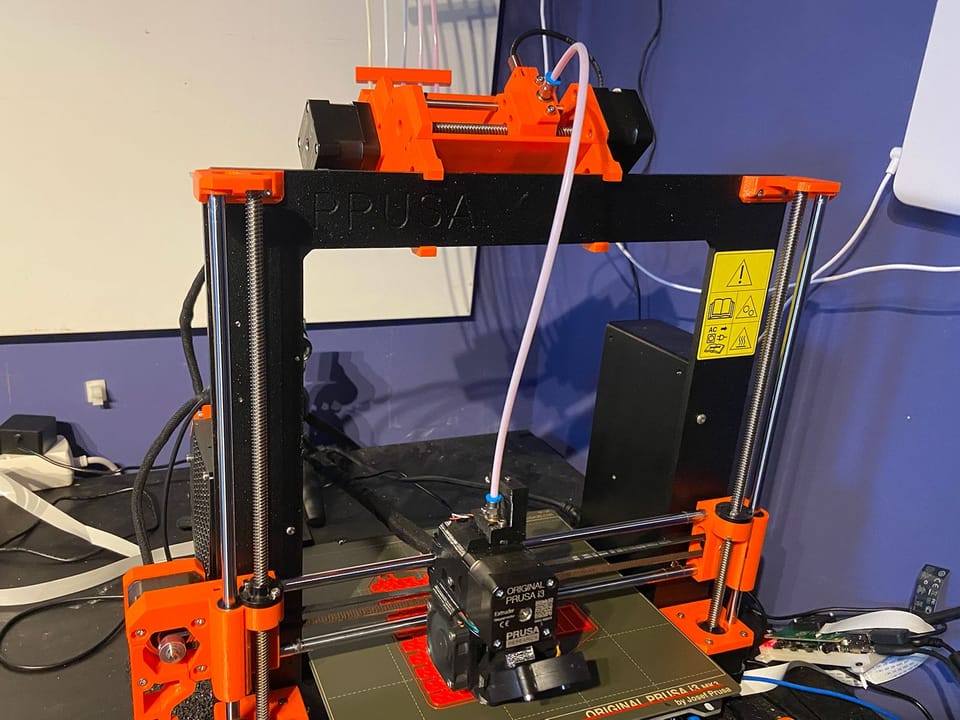
3D printing in one color is fantastic—3D printing in five colors is the next frontier. Ever since I started my 3D printing adventure, I’d wanted to buy a Multi-Material Upgrade, but I was hesitant after reading some reviews.
Many people seem to be having trouble getting the unit to function, and that’s no surprise given it’s an assembly of 3 motors, five pulleys, and two sensors. If one thing goes wrong, the whole machine will say no. And with just three lights on top that can only blink, it can be hard to debug.
But I was up for some challenge, and since the only true competitor for multi-material prints (the Palette 3) is more than twice as expensive, I decided to take the plunge and pay Mr. Prusa 300 euros.
I’m a grown-up man, but this machine brought me to tears. It was infuriating to get going. I can’t recall how often I’ve unscrewed everything, fastened bolts, and loosened them again. I could not get this upgrade to print anything. Every filament would get stuck, would not load, or would fail to unload. I got really close to the point of just reverting everything and going back to my stock i3 MK3S+.
But after watching a lot of videos (this episode of Chris’s Basement is a must-watch), I finally managed to dial in all the proper settings, and now my MMU2S works like a charm.
These are the tips & tricks that made my MMU2S a joy to work with. Most of them come from the Chris’s Basement video, but I’ve added my own experiences. If you are currently trying to get an MMU going, take heart and know you will get it going. Eventually.
Assembly
Just like with the Prusa printer itself:
- Read the comments below every step before you do that step
- Don’t overtighten
- Re-check all wiring at least five times
- Take your time (!)
Building an MMU2S isn’t really hard, but it’ll take time. It’s a small device, but you’ll have to put some work into it.
Make sure every sensor works.
Two necessary sensors need to work flawlessly to be able to print with multiple materials.
- The FINDA: this sensor (that works like the PINDA) will trigger when filament is inside the selector.
- The filament sensor will trigger when filament has reached the Bondtech gears (the extruder motor).
You can view the status of all sensors in your Prusa by going into Support and selecting Sensor Status.
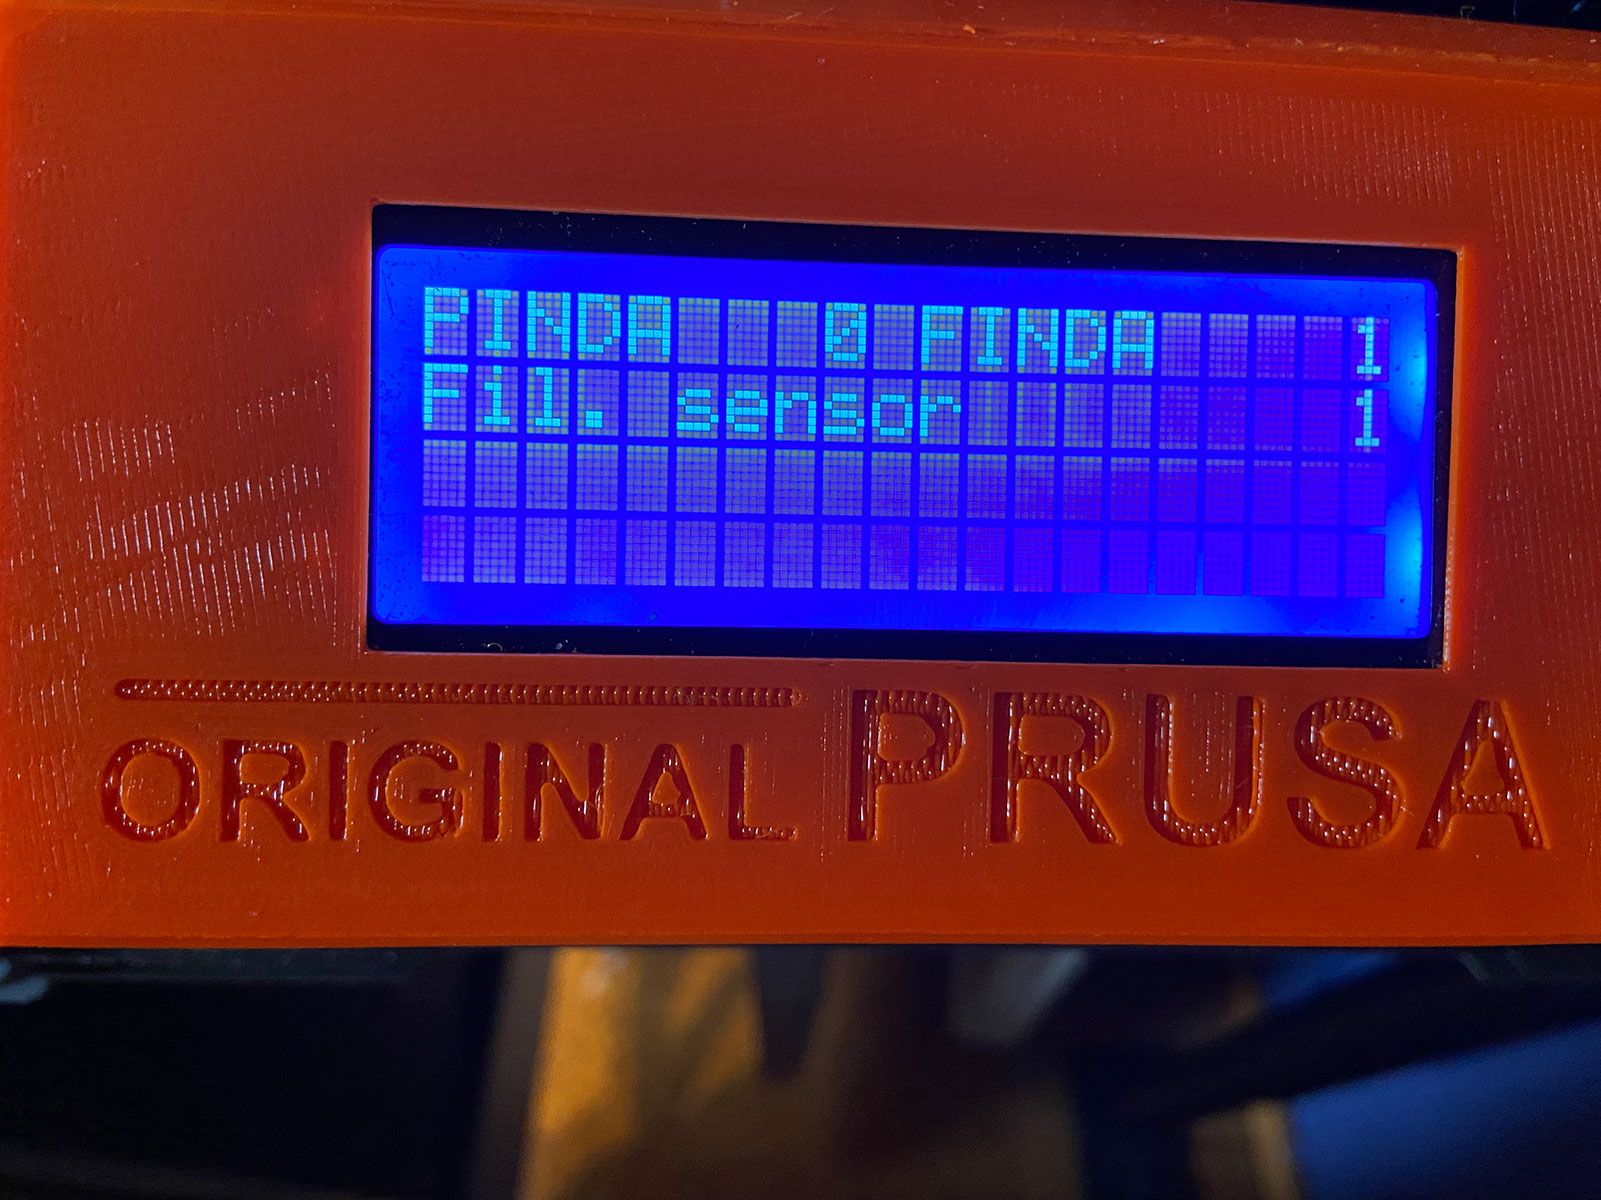
Manually trigger the FINDA by pushing some filament down the selector. The filament sensor is easier to activate with a small hex wrench.
If either one of them doesn’t trigger or fluctuates, you have to unscrew it and move it slightly until it works.
I didn’t have any sensor troubles, but this seems to be the most common MMU2S problem. Make sure your sensors work correctly. Otherwise, strange things will happen.
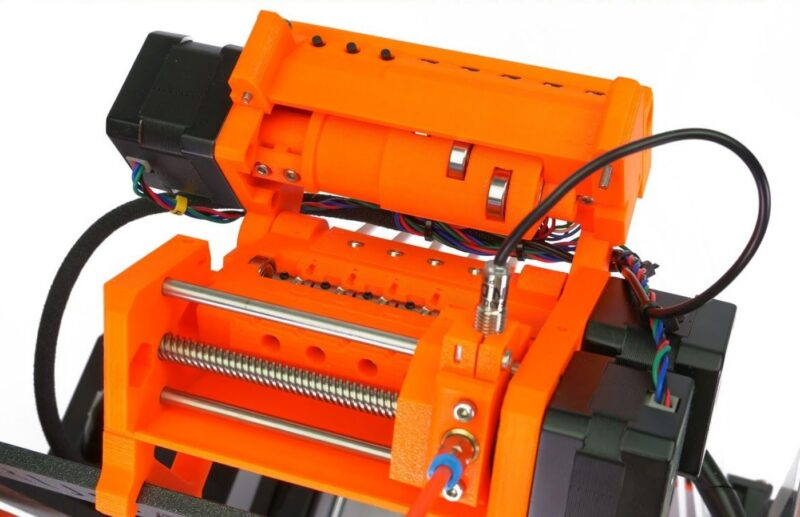
Tension screws
Ensure both the tension screws on the MMU2S unit and the extruder idler door have the proper tension. What’s the right tension? You’ll have to find out with trial & error.
If the pulley can’t load the filament by itself, but it loads fine when you push down on the door of your MMU unit, you can tighten the tension screws a bit. If your filament has piecing missing, you probably overtightened.
The same goes for the extruder idler door. If no filament gets extruded, the screw might be too loose. If the filament sensor doesn’t get triggered, it might be too tight (the filament can’t move the gears).
This is trial & error, but just like first layer calibration, you will get the hang of it.
Lose the buffer
The filament buffer Prusa provides is a charming idea, but it’s not fun to work with. Set it aside, at least while debugging. You don’t want to fiddle with loading and unloading filament through the small openings. It’s torture.
There are excellent alternatives available, like the RMU MK3, which has a better design, but you can just let the wires tangle freely while you try to get your MMU2S going.
I have a RepBox mounted above my printer, and I’m still waiting for my auto-rewinding spool holders. But to be honest: I don’t think I’ll actually need them. I’ve never had more than 1 meter of excess filament tangling.
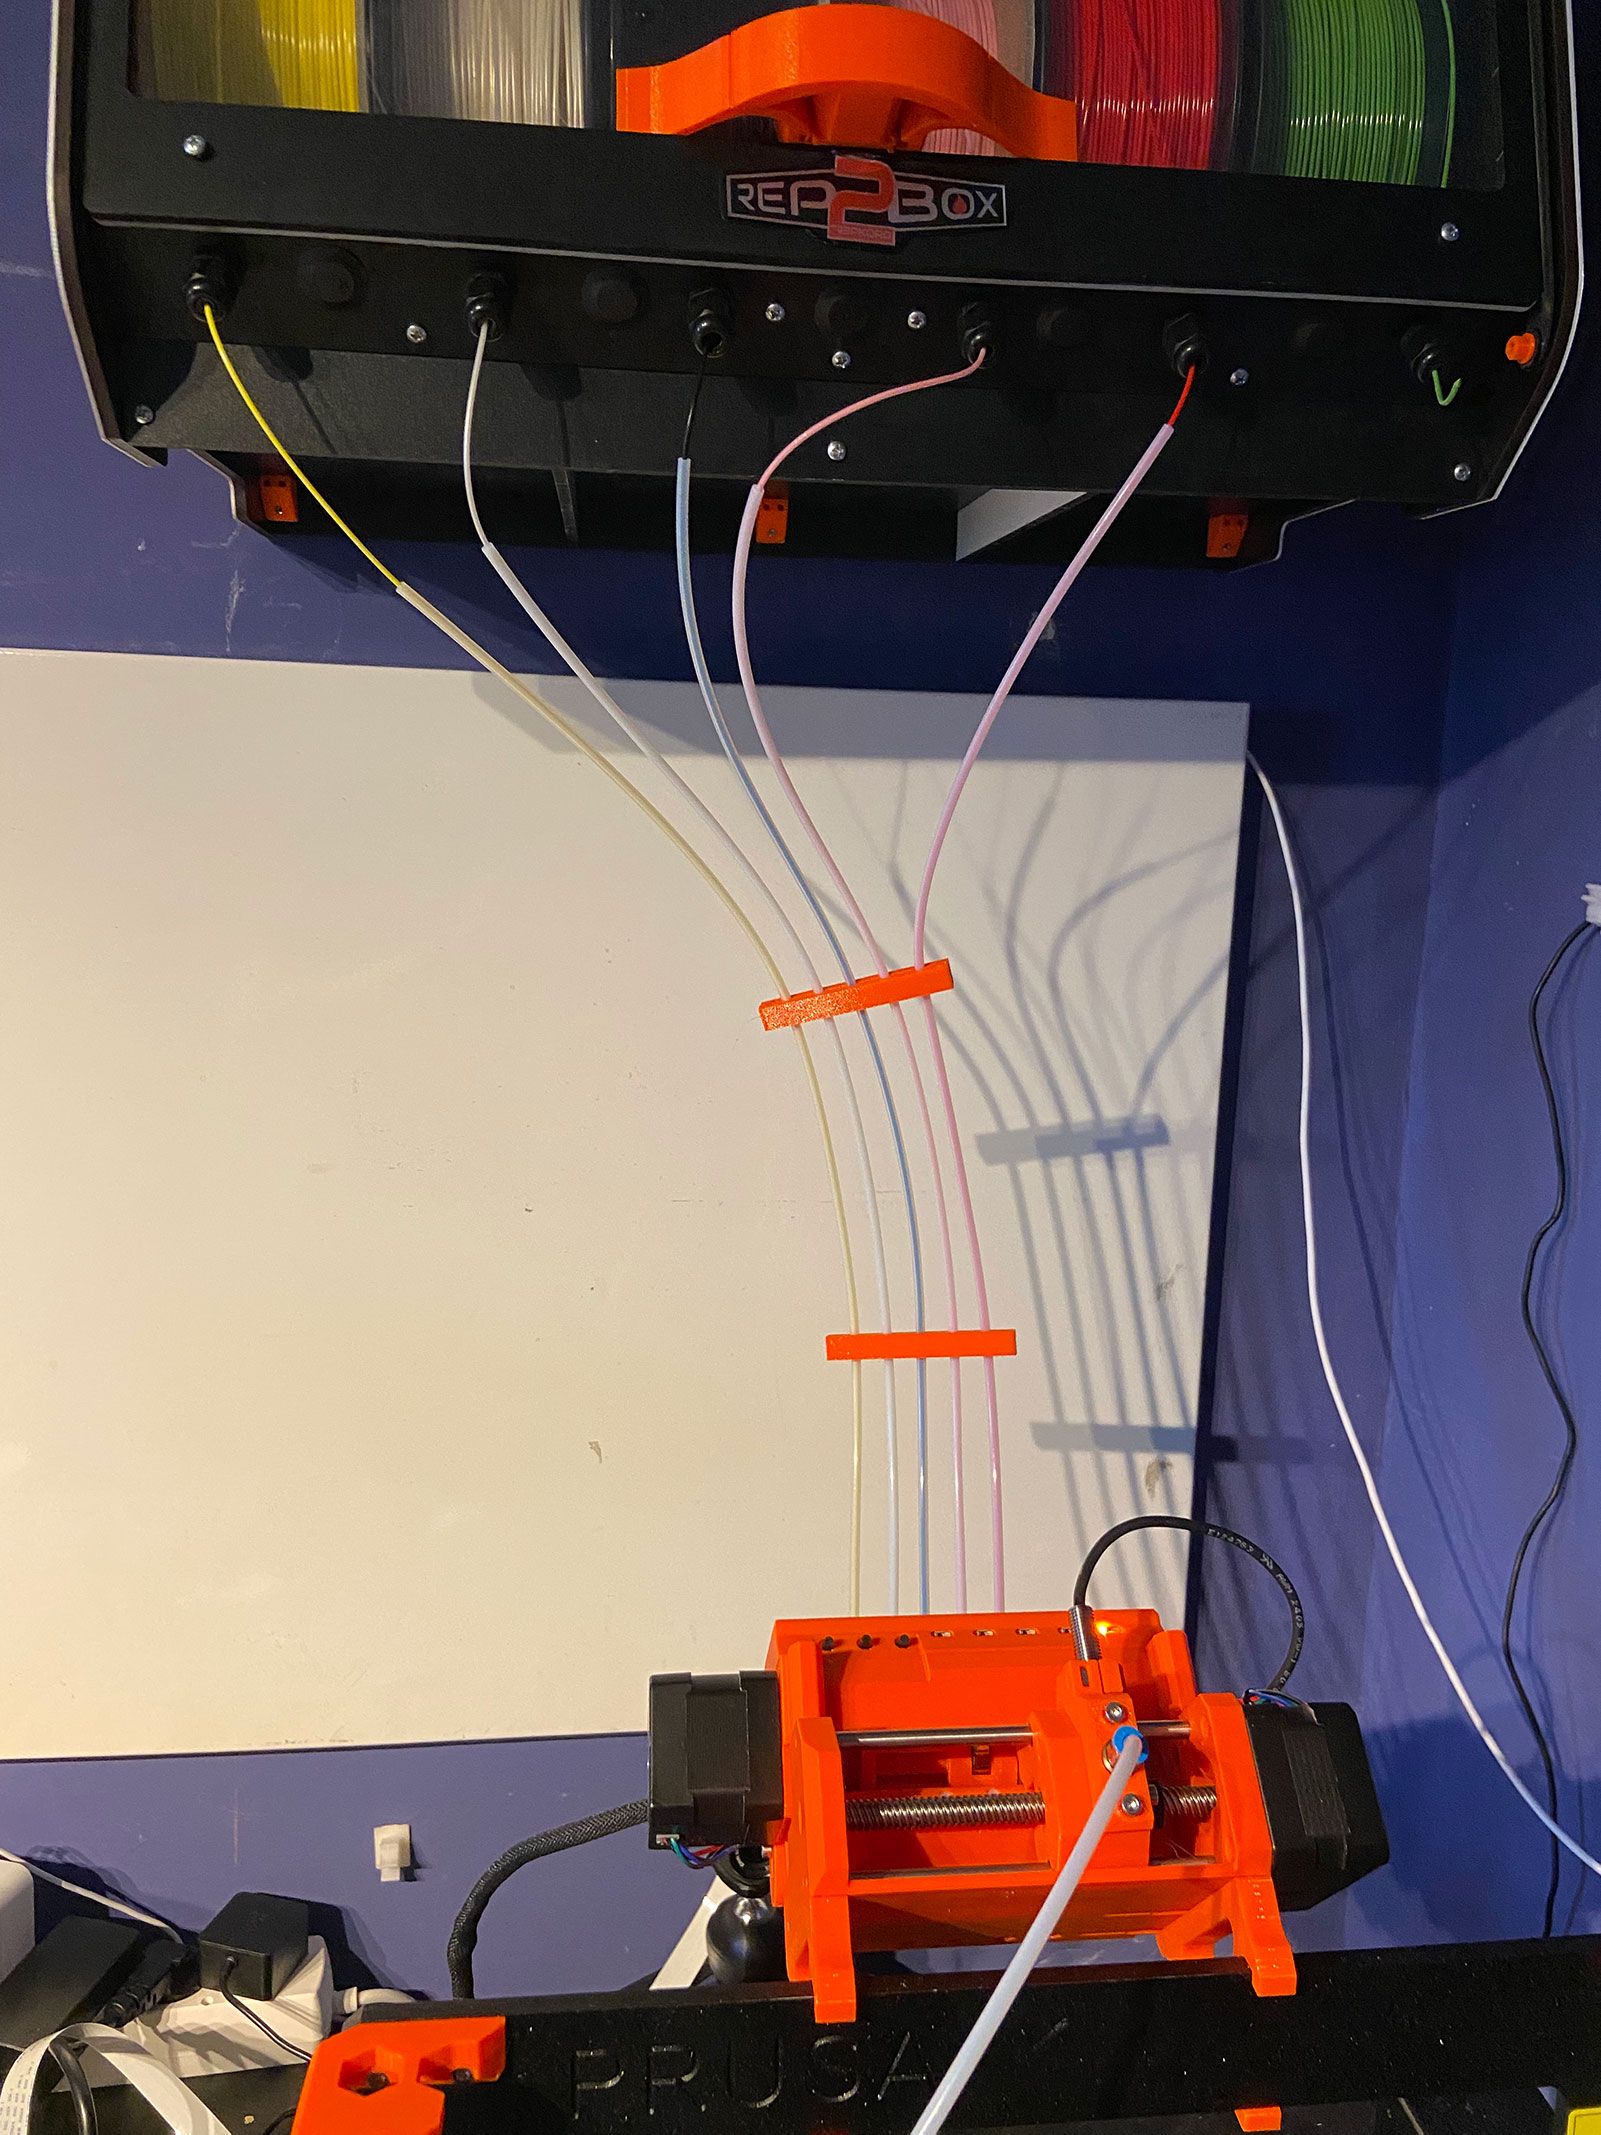
Make sure filament moves freely.
Test each filament path and make sure the filament moves freely. Don’t overtighten your fasteners, and make sure all your pulleys are aligned perfectly and mounted on the flat base of the stepper motor axis.
Make sure filament can make its way from the back to the front through the selector. Any friction here has to be eliminated.
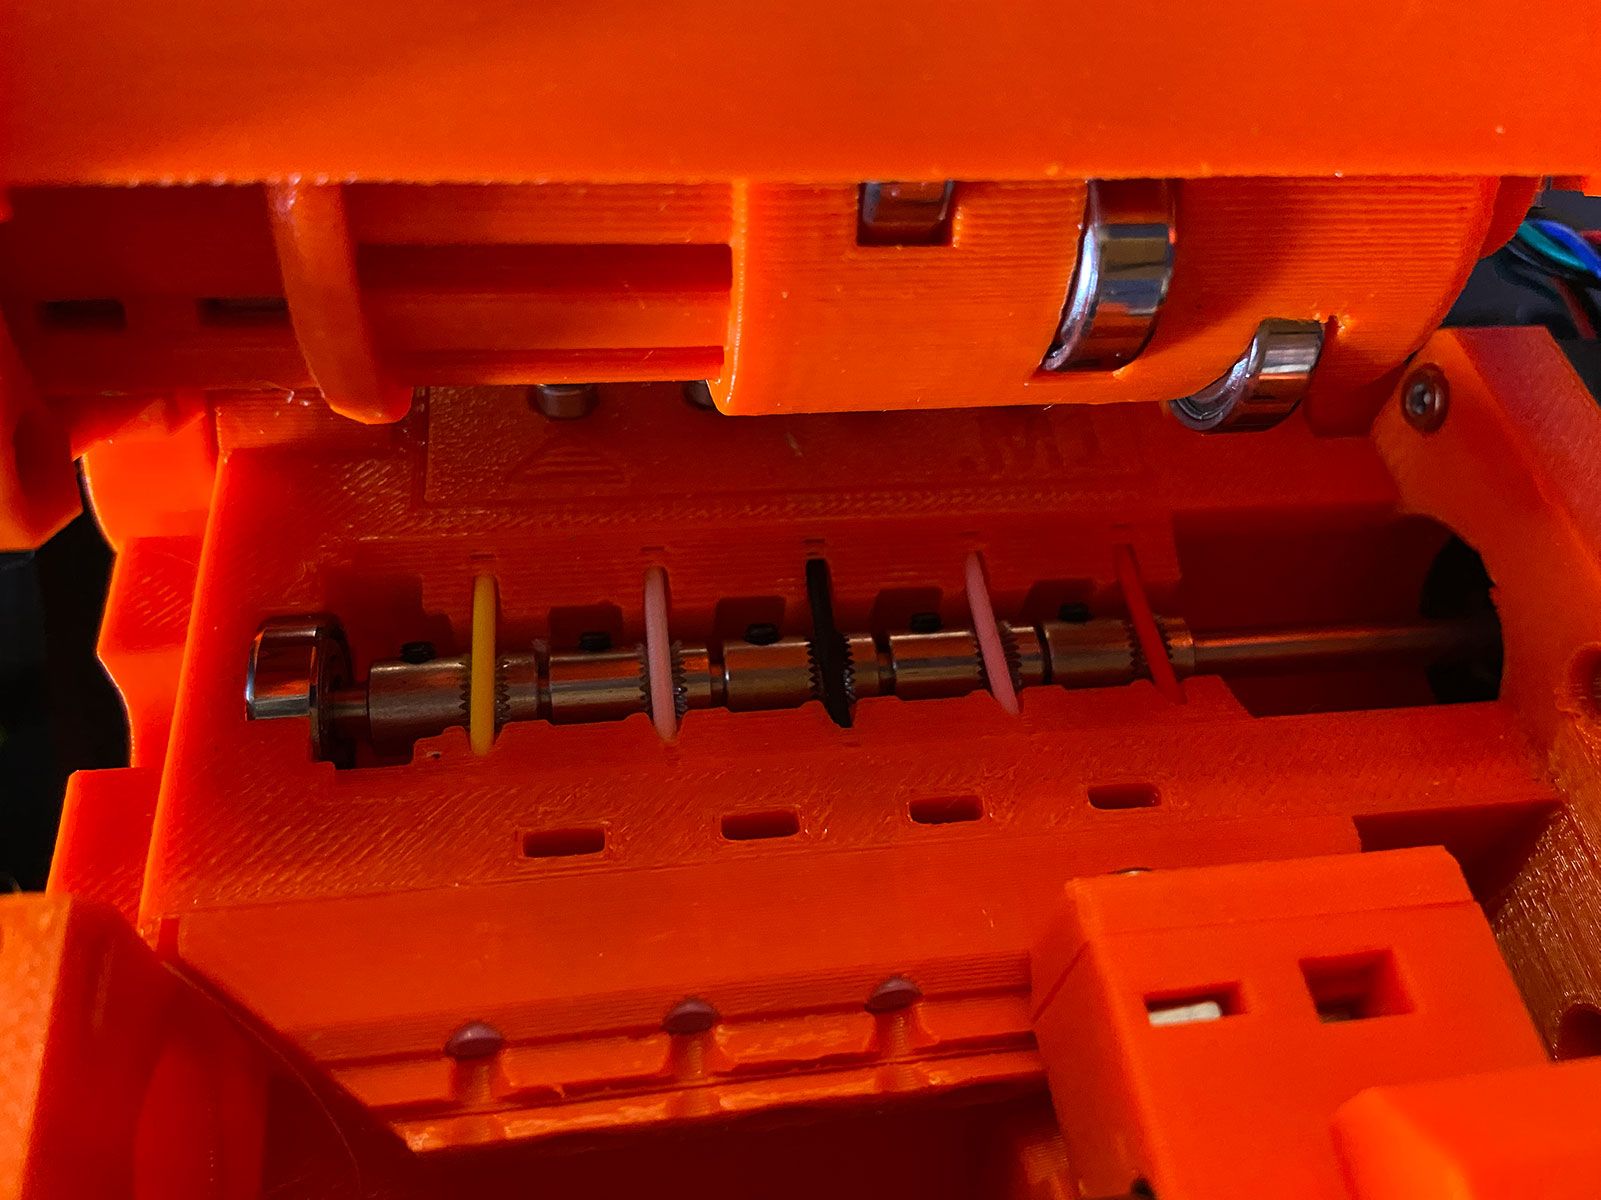
You also want to make sure your filament path is as straight as possible. The same extruder motor that was pulling a spool that was a mere 30 centimeters away on your stock Prusa i3 is now pulling filament that’s more than a meter away. You don’t want any bends. That’s why I printed some of these snap-together PTFE tube separators (as advised in Chris’s video – see the picture above).
Tune your PrusaSlicer settings
I was always getting tips that were slightly too fat to fit in the PTFE tubes.
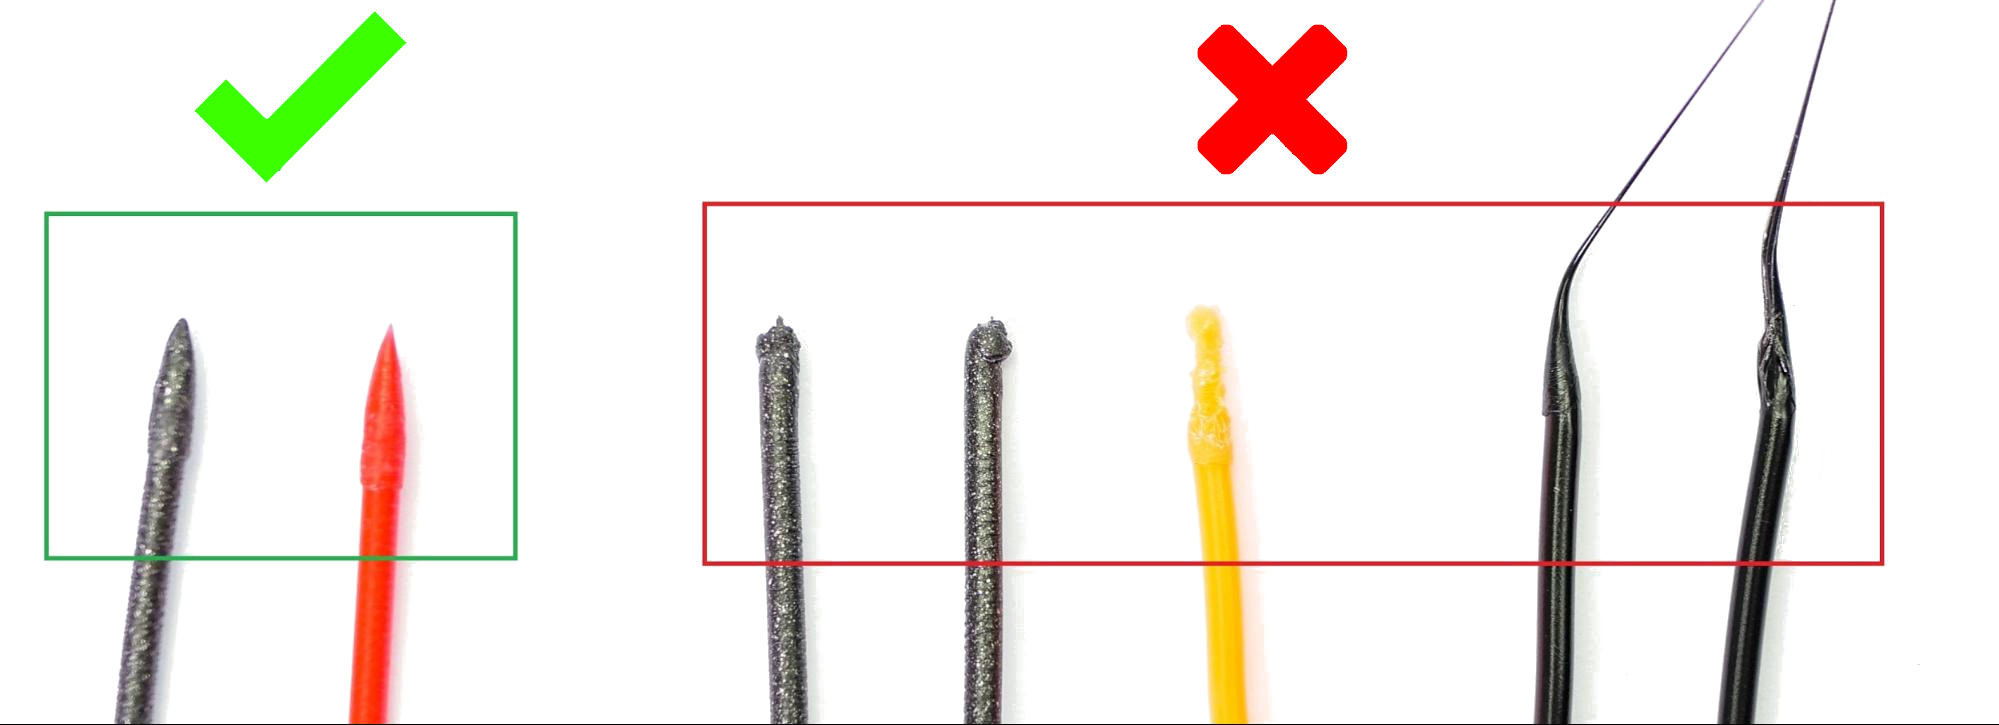
The best way to get better tips is to tweak the cooling moves and unloading speed in PrusaSlicer.
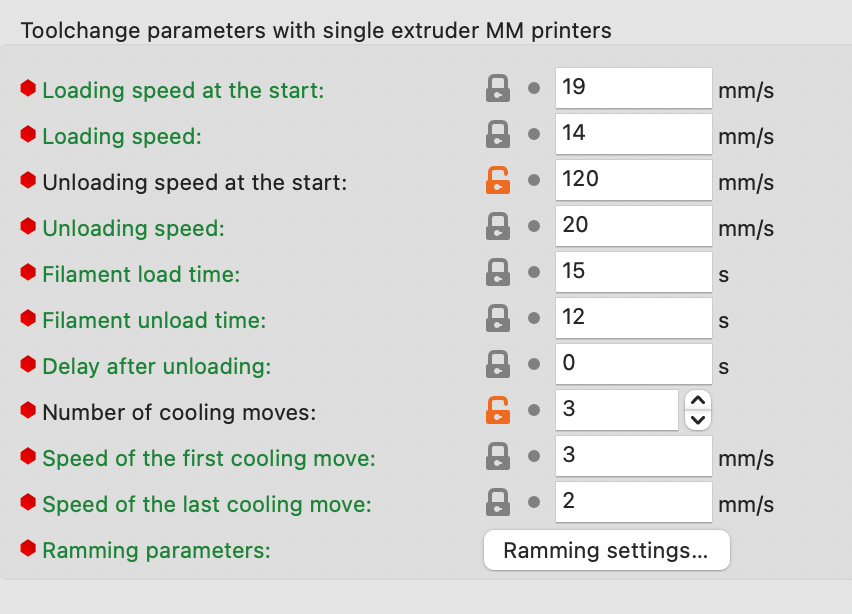
By using 2 to 3 cooling moves, you’re giving the filament some more time to cool down in the constrained area of the extruder. And by increasing the unloading speed slightly, you’re giving the filament less time to deform before it gets inside the PTFE tube.
You might have to tweak these settings for every filament. I have a spool of white AmazonBasics filament, which tends to string a lot unless printed at lower temperatures, so I created a separate profile for that filament.
Buy a wider PTFE tube.
Even with the correct slicer settings, I would sometimes still get stuck filament in the PTFE tube between the MMU2S unit and the extruder. There would be ever so slightly too much friction between the filament and the tube. Since this tube is nothing more than the guide between the MMU2S and your extruder, you can replace this with something a bit wider.
The default tube is about 1.8mm wide, which is quite snug. I bought a 2mm, a 2.5mm, and a 3mm tube, and with the 2.5mm tube, I have yet to have another blockage.
Remember to keep aside the old tube when you want to print with flexible filament (which likes tightness).
Conclusion
I hope these tips can save you some time. The MMU2S is an excellent piece of machinery, and I can really enjoy watching it and awe while it changes filament. But it can also be a massive pain in your ass.
If you’re still struggling, keep trying. You will get there in the end.
And I can’t stress it enough, watch this episode:
Member discussion