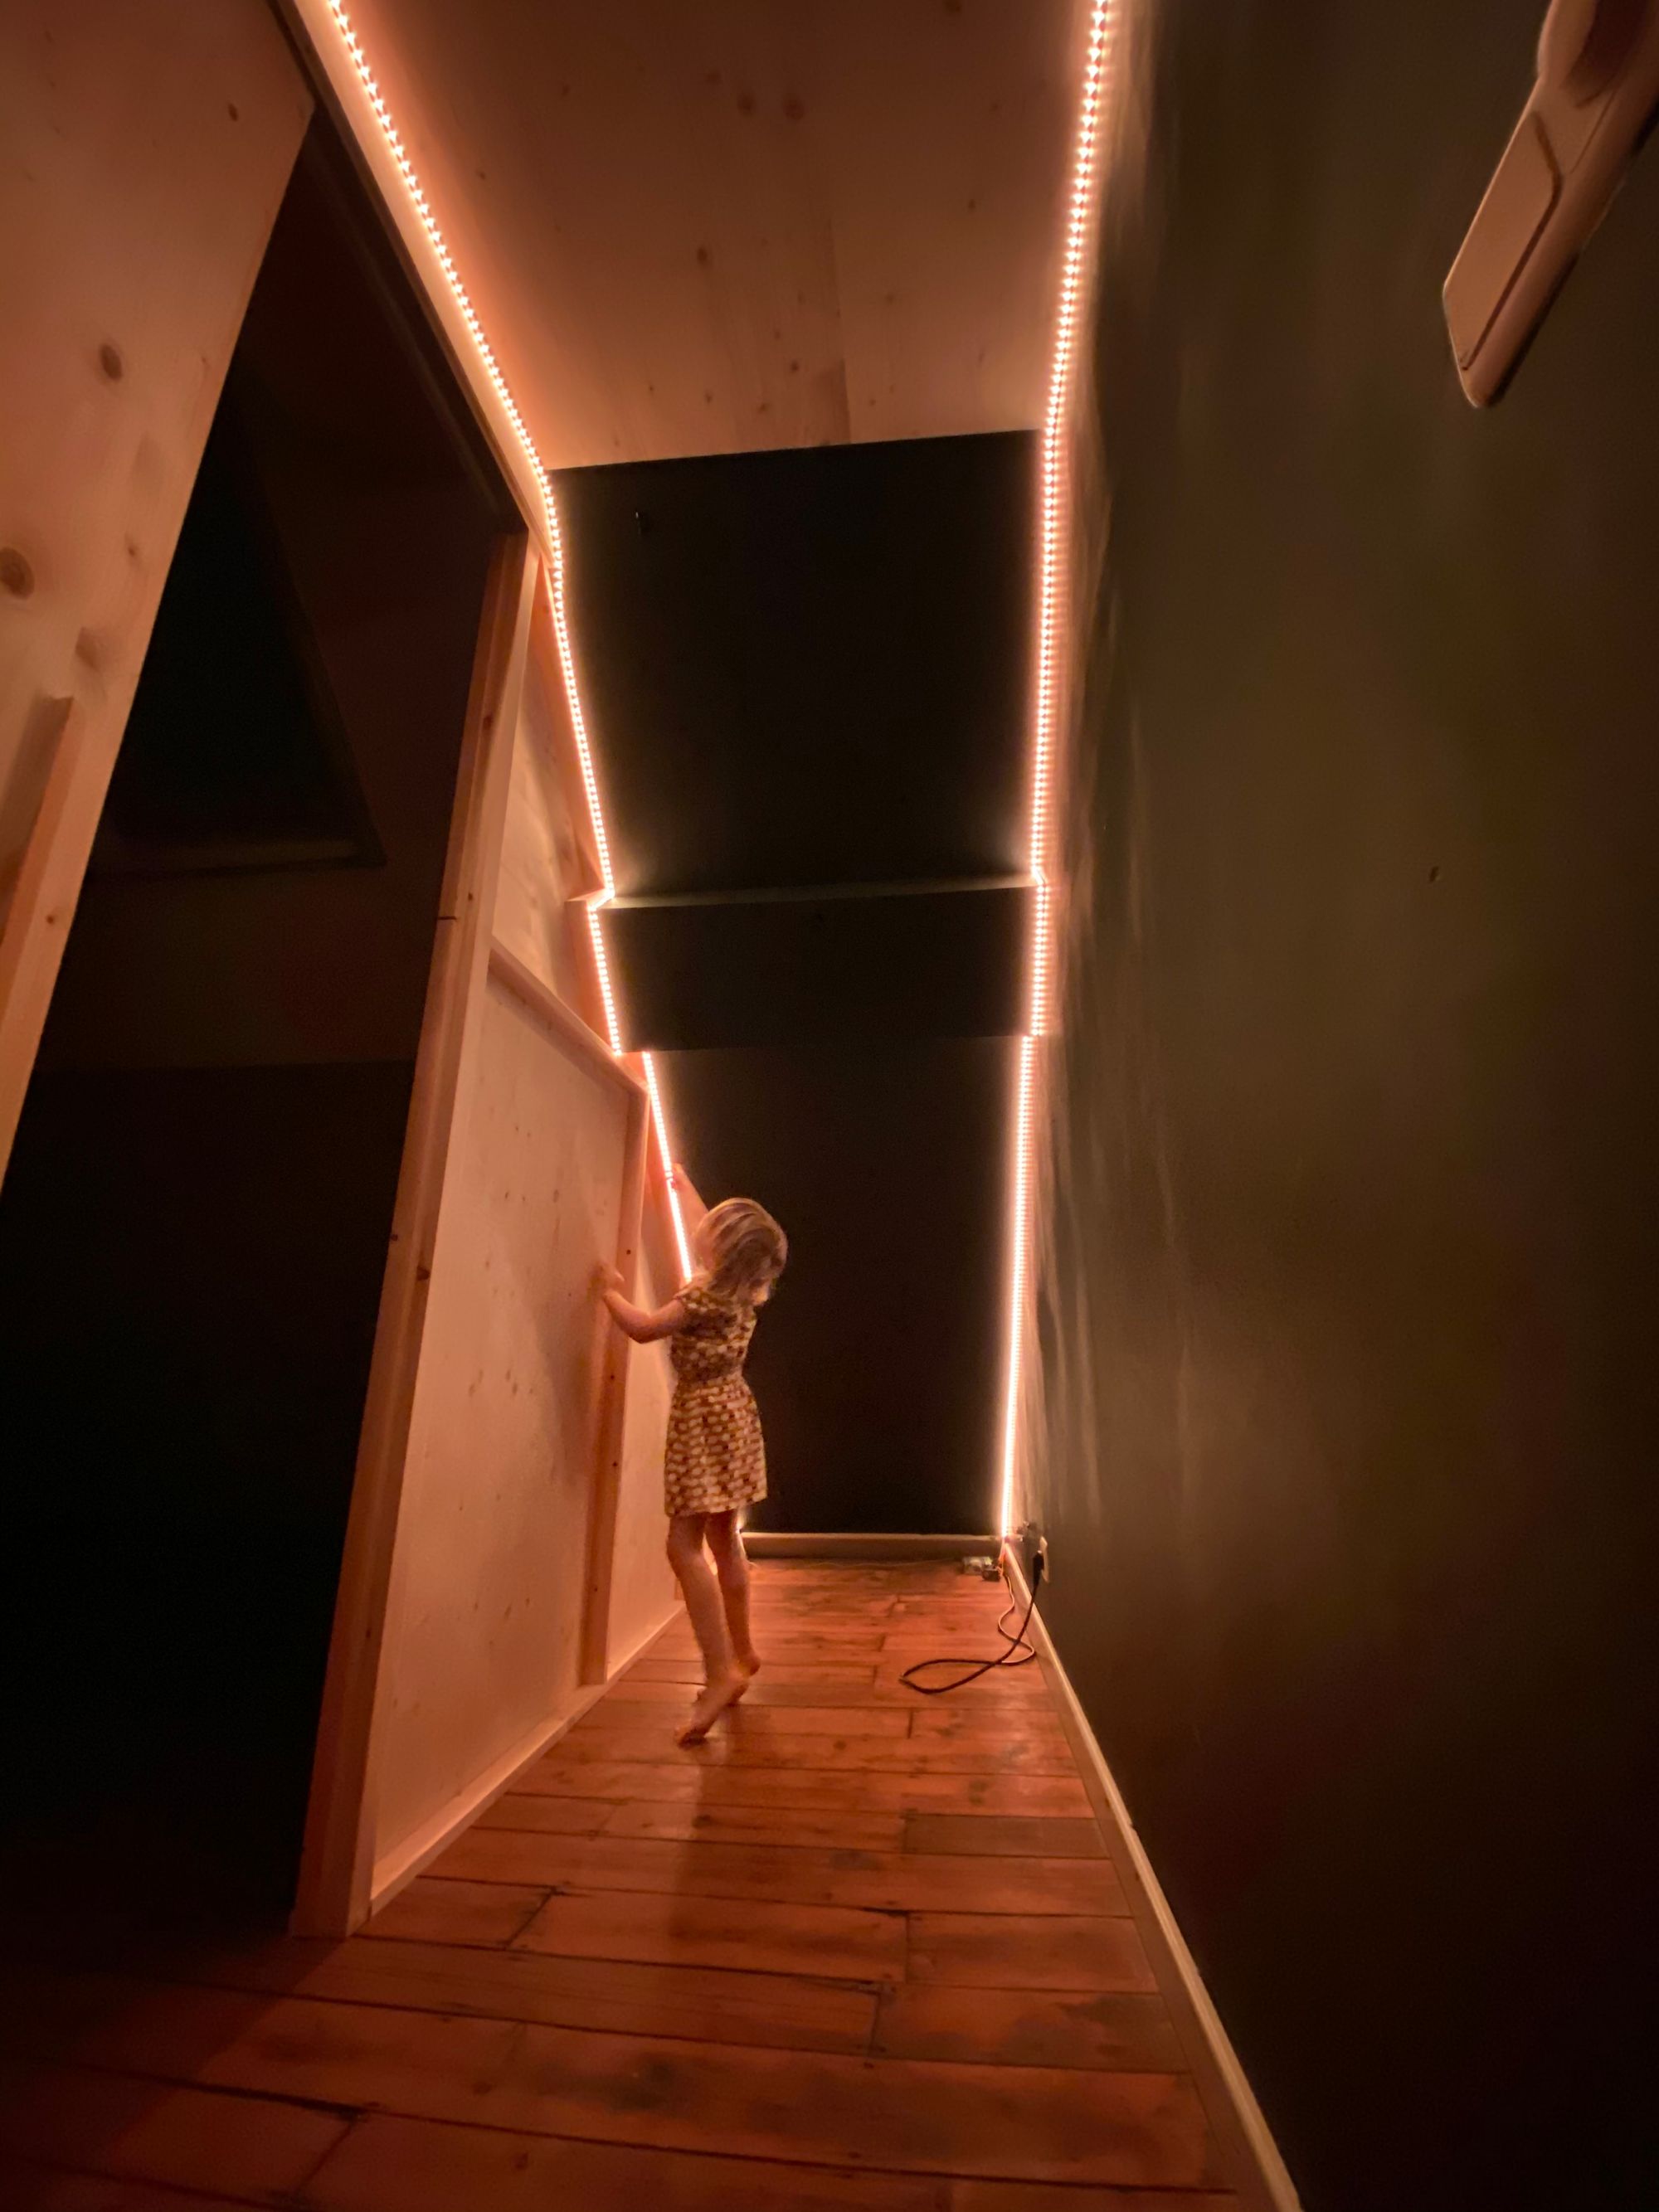
How I turned our stairwell into a nightclub
Recently we transformed our attic into a bedroom for our eldest daughter. There was no door before, so we had had a closet made with a sliding door in it. As a result, the attic is divided into a bedroom on one side and a dark staircase on the other.
That dark stairwell begged for lights. After some playing around, this is the result.
TL;DR;
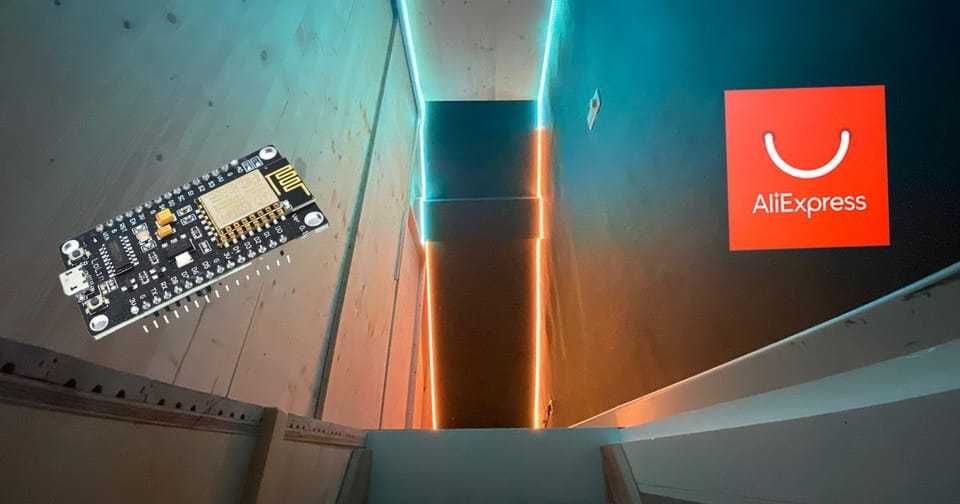
Order this:
If you follow my fantastic schematic below and flash WLED to your ESP8266, you’re done.
Introduction
Two years ago, I began to immerse myself in the beautiful world of Arduino. For the novice: an Arduino is a small development board with a microcontroller, with which you can program circuits.
Arduino’s are somewhat limited in terms of computing power, and if you want to connect to the Internet, you’ll have to put in a lot of effort.
ESP
Luckily other development boards are very good at that. Those boards contain the ESP8266 microchip. That chip can be programmed in the same way as an Arduino but has built-in WiFi and the necessary libraries to enable IoT applications. His big brother, the ESP32, is also equipped with Bluetooth (and is twice as fast).
The ESP family also has a great price. ESP8266 and ESP32 plates can be found on Aliexpress for less than 5 euros, which’s way less than the 30 euros you pay for a real Arduino UNO.
Such an ESP board is ideal for connecting some sensors to, for example, to monitor the temperature of a room in real-time, but they are also suitable for controlling LEDs from a distance.
Lights
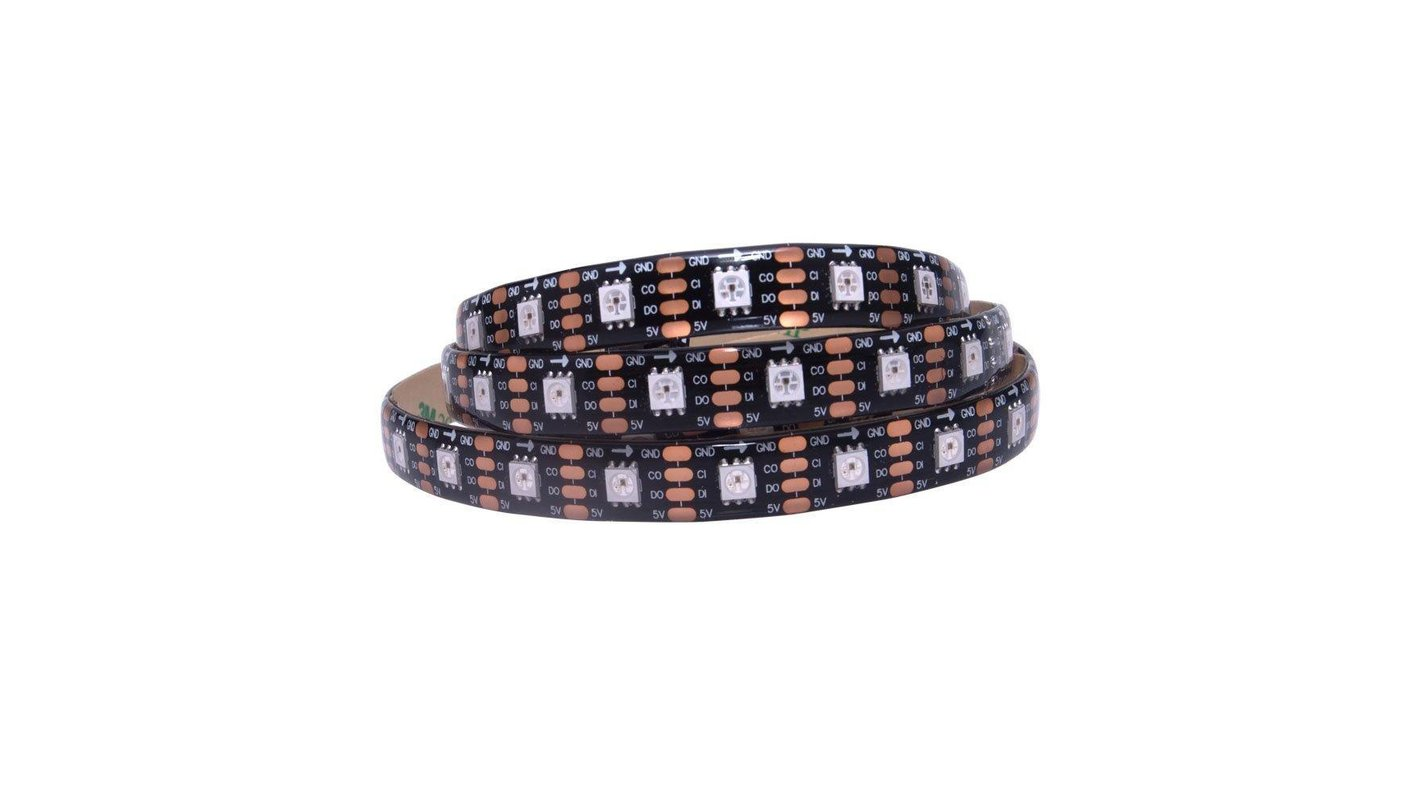
On Aliexpress, you can find LEDs of all shapes and sizes for almost no money. The easiest to control are 5V LEDs with WS2812B pixels (chip+LED). These are individually addressable (so each light can get a different color) and controlled with a high refresh rate.
I have already ordered these lights myself:
- Christmas tree lights, 50 pieces for €5,44.
- Flexible panels, around €10 for 256 LEDs.
- LED strips of 5 meters with 300 LEDs for €11,39
In this post, I’m going to focus on the LED strips. I ordered 2 of them for the staircase, 1 for each side, so that’s 600 LEDs in total.
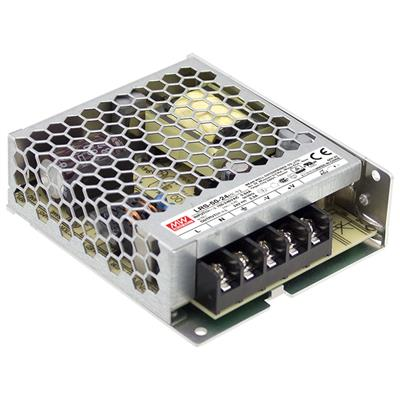
Power supply
The easiest way to power an ESP8266 is via the micro USB port found on most boards. This has the disadvantage that you have relatively little amperage to control your LEDs. Knowing that each LED requires 60 milliamperes (20 milliamperes per color: red-green-blue at maximum brightness), you will be able to provide some 15 to 30 LEDs with full brightness without an external power supply (depending on the current of your USB adapter). The amount of LEDs you can drive is always higher in practice because you will not be showing bright white light a lot.
If you want to control 600 LEDs, you can’t get around an external power supply. The math 600 * 0.06A comes to a power supply of 36A. But to test, I used a power supply of 10A, and it works perfectly. Because playing with 220 volts involves a little more risk, I also ordered locally and not on Aliexpress.
Connecting
Connecting the LED strip itself is painless. The WS2812B strips have three wires: red (current), black (ground), and green (data). I have placed a diagram of my connection below:
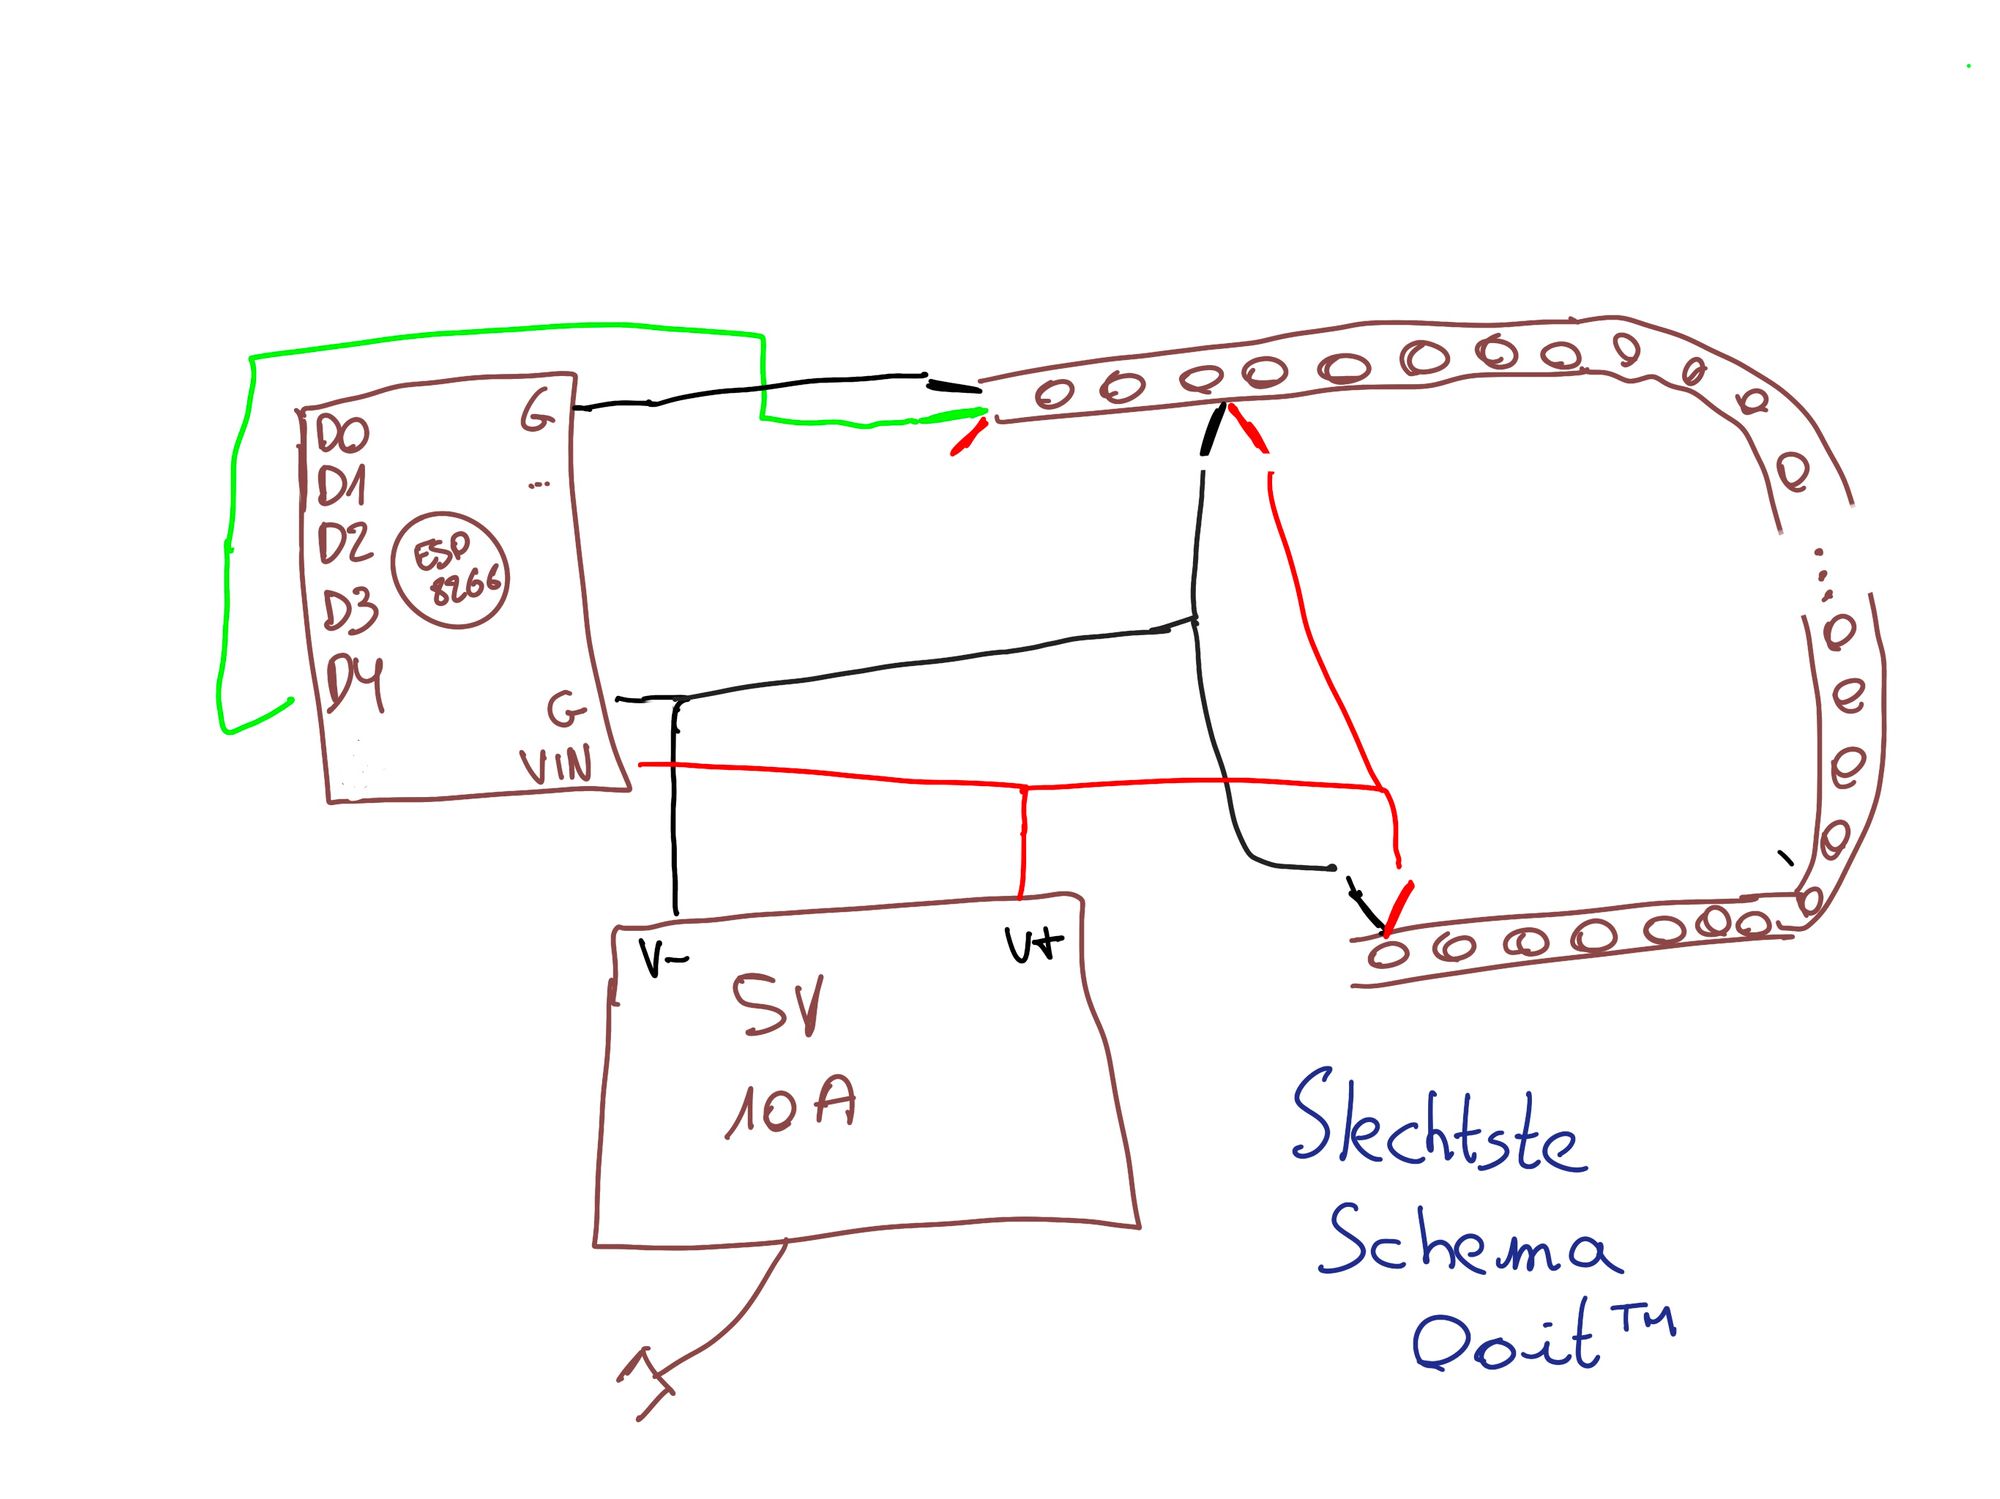
As you can see (or not – because it’s really a lousy scheme), I connect the power supply to the board (via the VIN and GND pins) and different locations on the LED strips. 5V LEDs lose some voltage along the way, and by supplying them with power in different places, you prevent the start of your ribbon from being brighter than the end. I also connect the black wire of the strip to a GND pin of the ESP8266. Otherwise, the data line would not work.
Attentive readers will now say: the ESP8266 works on 3.3V, and your power supply and strip are 5V. How does that work?
- For the board, it’s not a problem. The boards I use (and I suspect almost all ESP8266’s) convert power via USB and VIN internally to 3.3V.
- In theory, you should convert the data signal on pin D4 via a level shifter, but I have never had to do this in practice. If you get funky things like flashing LEDs or pieces of the strip that do nothing, I recommend adding a level shifter in between.

Software
- Write a sketch yourself in the Arduino IDE, using an existing library such as FastLED. This gives a lot of flexibility, but you have to do everything yourself.
- Put ESPHome on your board. This is a firmware that focuses on smart home applications and makes it easy to make all kinds of sensors, buttons, and LEDs accessible via, for example, Home Assistant. I use ESPHome to pass the temperature in my server cabinet and the humidity in the basement to HomeAssistant. For each application you want to create, you write a simple configuration file (example). You say which data pin each sensor is connected to, and after you flash it, you will see the necessary entities HomeAssistant.
- Put WLED on your board. WLED is a bit like ESPHome, but just for LEDs. Where ESPHome comes with a dozen (reasonably basic) effects, there are more than a hundred in WLED. You’ll also get beautiful color palettes, the ability to create different segments (each with a different effect or mirrored), and lots of crazy extras like a custom app, user-friendly website, Philips Hue sync, and Home Assistant integration.
The most user-friendly and comprehensive way is WLED. To put this on your ESP8266 using a Mac:
- Open a Terminal
pip3 install esptool.py- Download the latest version of WLED (WLED_0.11.1_ESP8266.bin at time of writing)
- Go to the right folder
esptool.py write_flash 0x0 ./WLED_0.11.1_ESP8266.bin- You should be able to connect to the WiFi network WLED-AP with password wled1234.
- If you browse to http://wled.me, you should get to the setup page where you need to set up your WiFi, among other things.
Once connected to your WiFi, you can set up your LEDs via the app (iOS and Android) or in the browser (http://wled.local). For example, you’ll have to indicate how many LEDs you want to control and how many amperes your power supply delivers, so WLED won’t overload. You can also divide your LEDs into multiple segments.
You can find additional explanations here and here if it doesn’t work out.
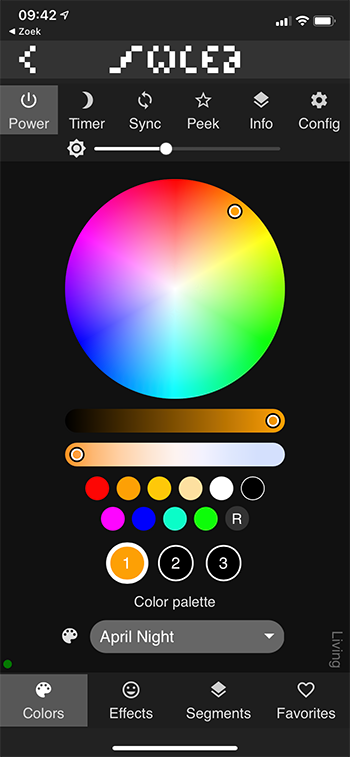
After installing, you can start playing with the many effects, palettes, and other fun stuff. If you have Home Assistant installed, the integration will also appear automatically.
Conclusion
The total cost of this project was less than 50 euros. That’s 10 meters of LEDs for much less than Philips sells you for only 2 meters (which can not even display different colors).
Looking for a new hobby for 2021? Then I can only recommend playing with microcontrollers and home automation. By the way, I still have a few posts in the pipeline about ESPHome and HomeAssistant. So stay tuned.
Any questions or comments? Leave them below!
- The double-sided tape that hangs on the LED strips is not of excellent quality. I expect I’ll have to replace it with something more decent.
- Jumper wires tend to loosen. In time, I’m going to solder everything up.
- The power supply dares to make a squeaking sound at low loads. That’s normal.
- Are the colors wrong? Is red displayed as green and green as red? In the settings of WLED, you can choose the order. The order of the LED strip I use is GRB (green-red-blue).
- I plan to equip this project with a motion sensor and a switch. WLED is easy to customize, and there are already many usermods.
- There is also a fork of WLED that responds to sound, interesting for cool visualizations.
Member discussion